本篇内容主要讲解“iOS架构从MVC、MVP到MVVM源码分析”,感兴趣的朋友不妨来看看。本文介绍的方法操作简单快捷,实用性强。下面就让小编来带大家学习“iOS架构从MVC、MVP到MVVM源码分析”吧!
MVC设计模式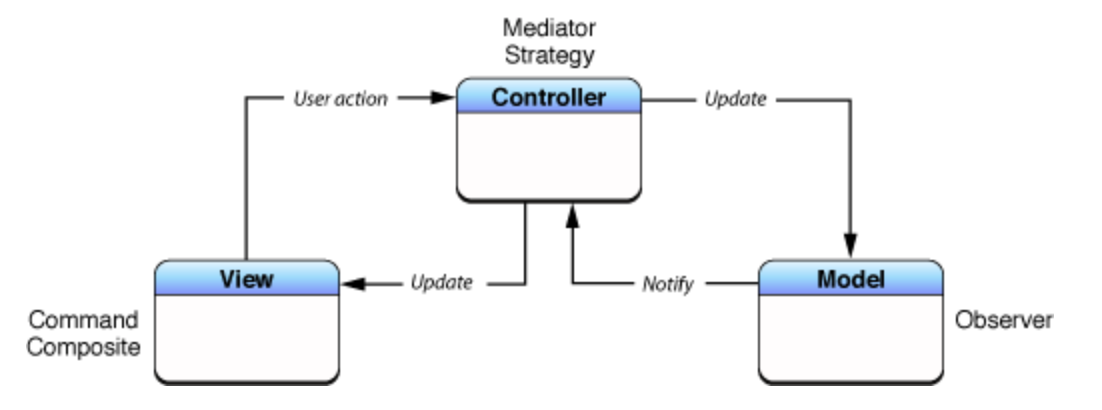
M: Model 数据层,负责网络数据的处理,数据持久化存储和读取等工作V: View 视图层,负责呈现从数据层传递的数据渲染工作,以及与用户的交互工作C: Controller控制器,负责连接Model层跟View层,响应View的事件和作为View的代理,以及界面跳转和生命周期的处理等任务
用户点击 View(视图) --> 视图响应事件 -->通过代理传递事件到Controller–>发起网络请求更新Model—>Model处理完数据–>代理或通知给Controller–>改变视图样式–>完成
可以看到Controller强引用View与Model,而View与Model是分离的,所以就可以保证Model和View的可测试性和复用性,但是Controller不行,因为Controller是Model和View的中介,所以不能复用,或者说很难复用。
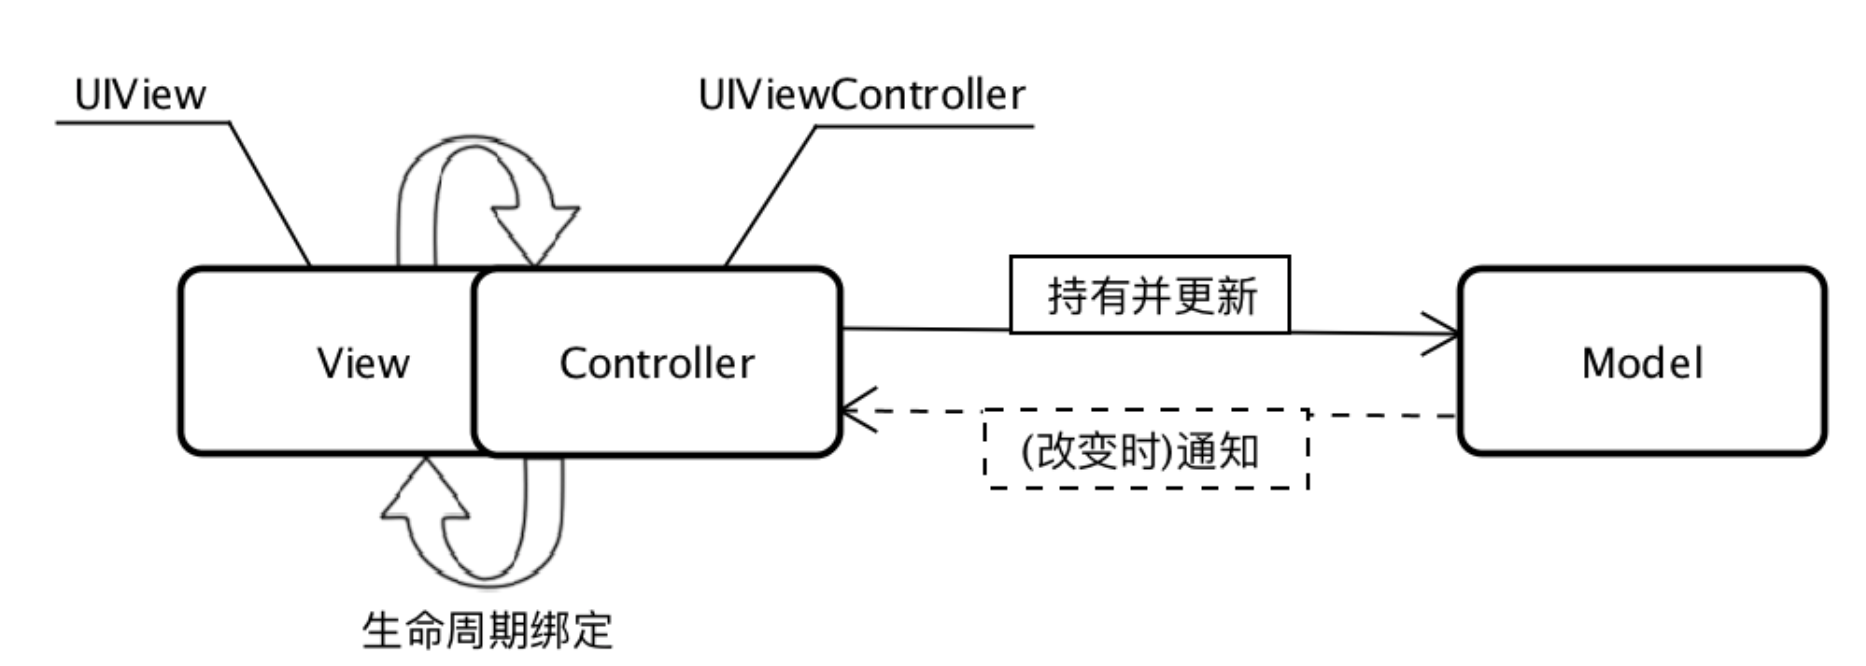 在我们实际开发中使用的MVC模式可以看到,View与Controller耦合在一起了。这是由于每一个界面的创建都需要一个Controller,而每一个Controller里面必然会带一个View,这就导致了C和V的耦合。这种结构确实可以提高开发效率,但是一旦界面复杂就会造成Controller变得非常臃肿和难以维护。
我们要实现一个简单的列表页面,每行cell都一个按钮,点击按钮前面数字 1操作。
1操作。
核心代码:
// Controller
- (UITableViewCell*)tableView:(UITableView *)tableView cellForRowAtIndexPath:(NSIndexPath *)indexPath{

    __weak typeof(self) wealSelf = self;
    MVCTableViewCell *cell = [tableView dequeueReusableCellWithIdentifier:@"Cell_identifer"];
    if(cell == nil){
        cell = [[MVCTableViewCell alloc] initWithStyle:UITableViewCellStyleDefault reuseIdentifier:@"Cell_identifer"];
    }
    DemoModel *model = self.dataArray[indexPath.row];
    [cell loadDataWithModel:model];
    cell.clickBtn = ^{
        NSLog(@"id===%ld",model.num);
        [wealSelf changeNumWithModel:model];
    };
    cell.selectionStyle = UITableViewCellSelectionStyleNone;
    return cell;
}
/*
* 用户点击事件通过Block传递过来后,在Controller层处理更新Mdoel以及更新视图的逻辑
*/
- (void)changeNumWithModel:(DemoModel*)model{

    model.num++;
    NSIndexPath *path = [NSIndexPath indexPathForRow:model.Id inSection:0];
    [self.mainTabelView reloadRowsAtIndexPaths:@[path] withRowAnimation:UITableViewRowAnimationLeft];
}
可以看到用户点击事件通过Block传递过来后,在Controller层处理更新Mdoel以及更新视图的逻辑
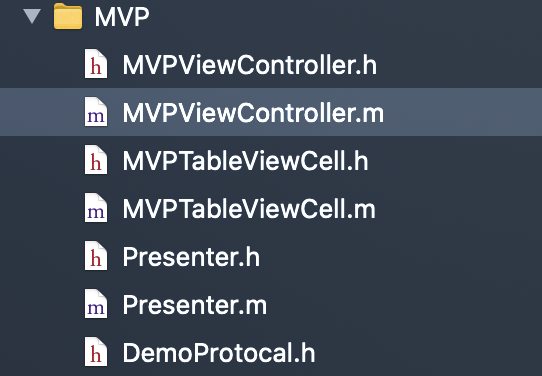
MVP设计模式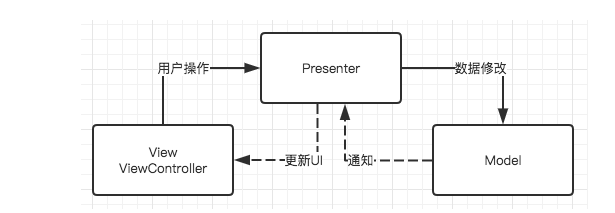
M: Model 数据层,负责网络数据的处理,数据持久化存储和读取等工作V: View 视图层,负责呈现从数据层传递的数据渲染工作,以及与用户的交互,这里把Controller层也合并到视图层P: Presenter层,负责视图需要数据的获取,获取到数据后刷新视图。响应View的事件和作为View的代理。
可以看到 MVP模式跟原始的MVC模式非常相似,完全实现了View与Model层的分离,而且把业务逻辑放在了Presenter层中,视图需要的所有数据都从Presenter获取,而View与 Presenter通过协议进行事件的传递。
用户点击 View(视图) --> 视图响应事件 -->通过代理传递事件到Presenter–>发起网络请求更新Model–>Model处理完数据–>代理或通知给视图(View或是Controller)–>改变视图样式–>完成
//DemoProtocal
import <Foundation/Foundation.h>

@protocol DemoProtocal <NSObject>
@optional
//用户点击按钮 触发事件: UI改变传值到model数据改变  UI --- > Model 点击cell 按钮
-(void)didClickCellAddBtnWithIndexPathRow:(NSInteger)index;
//model数据改变传值到UI界面刷新 Model --- > UI
-(void)reloadUI;
@end
我们把所有的代理抽象出来,成为一个Protocal文件。这两个方法的作用:
-(void)didClickCellAddBtnWithIndexPathRow:(NSInteger)index;:Cell视图调用它去Presenter层实现点击逻辑的处理
-(void)reloadUI;: Presenter调用它去更新主视图View或者Controller
//Presenter.h
#import <Foundation/Foundation.h>
#import <UIKit/UIKit.h>
#import "DemoProtocal.h"

NS_ASSUME_NONNULL_BEGIN

@interface Presenter : NSObject
@property (nonatomic, strong,readonly) NSMutableArray *dataArray;
@property (nonatomic, weak) id<DemoProtocal>delegate;//协议,去更新主视图UI
// 更新 TableView UI 根据需求
- (void)requestDataAndUpdateUI;
//更新 cell UI
- (void)updateCell:(UITableViewCell*)cell withIndex:(NSInteger)index;
@end
dataArray : 视图需要的数据源
- (void)requestDataAndUpdateUI;:主视图Controller调用,去更新自己的UI
- (void)updateCell:(UITableViewCell*)cell withIndex:(NSInteger)index;:更新 Cell的UI
//Controller 层
- (void)iniData{
    self.presenter = [[Presenter alloc] init];
    self.presenter.delegate = self;
    [self.presenter requestDataAndUpdateUI];
}
...

- (NSInteger)tableView:(UITableView *)tableView numberOfRowsInSection:(NSInteger)section{
    return self.presenter.dataArray.count;
}
- (UITableViewCell*)tableView:(UITableView *)tableView cellForRowAtIndexPath:(NSIndexPath *)indexPath{

    MVPTableViewCell *cell = [tableView dequeueReusableCellWithIdentifier:@"Cell_identifer"];
    if(cell == nil){
        cell = [[MVPTableViewCell alloc] initWithStyle:UITableViewCellStyleDefault reuseIdentifier:@"Cell_identifer"];
    }
    //更新cell UI 数据
    [self.presenter updateCell:cell withIndex:indexPath.row];
    cell.selectionStyle = UITableViewCellSelectionStyleNone;
    return cell;
}

#pragma mark - DemoProtocal
//Presenter 的代理回调 数据更新了通知View去更新视图
- (void)reloadUI{
    [self.mainTabelView reloadData];
}
Controller层初始化Presenter,调用其方法更新自己的UI,可以看到网络数据的获取,处理都在Presenter中,处理完成后通过协议回调给Controller去reload数据
//Cell
- (void)addBtnDown:(UIButton*)btn{
    NSLog(@"%s",__func__);
    if([self.delegate respondsToSelector:@selector(didClickCellAddBtnWithIndexPathRow:)]){
        [self.delegate didClickCellAddBtnWithIndexPathRow:self.index];
    }
}
Cell层点击事件通过协议调用,而这个协议方法的实现是在Presenter中实现的。
MVP模式也有自身的缺点,所有的用户操作和更新UI的回调需要定义,随着交互越来越复杂,这些定义都要有很大一坨代码。逻辑过于复杂的情况下,Present本身也会变得臃肿。所以衍生出了MVVM模式。
MVVM+RAC设计模式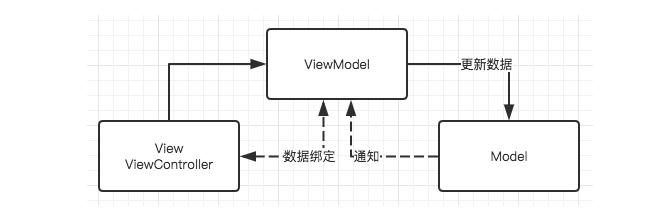
M: Model 数据层,负责网络数据的处理,数据持久化存储和读取等工作V: View 视图层,此时的视图层包括Controller,负责呈现从数据层传递的数据渲染工作,以及与用户的交互VM:ViewModel层,负责视图需要数据的获取,获取到数据后刷新视图。响应View的事件和作为View的代理等工作。
通过架构图可以看到,MVVM模式跟MVP模式基本类似。主要区别是在MVP基础上加入了双向绑定机制。当被绑定对象某个值的变化时,绑定对象会自动感知,无需被绑定对象主动通知绑定对象。可以使用KVO和RAC实现。我们这里采用了RAC的实现方式。
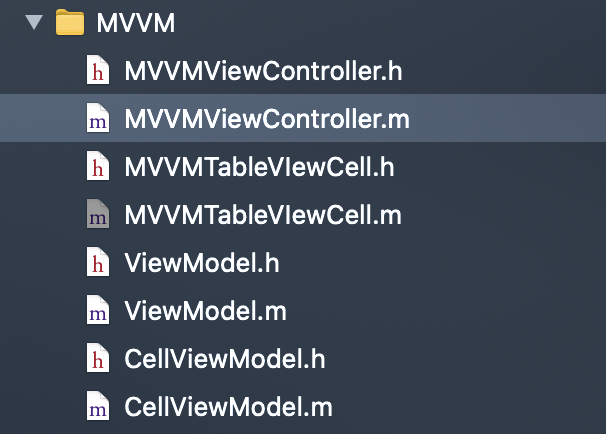
我们这里包括两层视图:主视图Controller以及Cell,分别对应两层ViewModel:ViewModel和CellViewModel
//ViewModel.h

@interface ViewModel : NSObject
//发送数据请求的Rac,可以去订阅获取 请求结果
@property (nonatomic,strong,readonly) RACCommand *requestCommand;
@property (nonatomic,strong) NSArray *dataArr;//返回子级对象的ViewModel
- (CellViewModel *)itemViewModelForIndex:(NSInteger)index;
@end
RACCommand *requestCommand:提供供主视图调用的命令,调用它去获取网络数据
NSArray *dataArr: 提供供主视图使用的数据源,注意这里不能用NSMutableArray,因为NSMutableArray不支持KVO,不能被RACObserve。
- (CellViewModel *)itemViewModelForIndex:(NSInteger)index; 根据Cell的index返回它需要的的ViewModel
@interface CellViewModel : NSObject

@property (nonatomic,copy,readonly) NSString *titleStr;

@property (nonatomic,copy,readonly) NSString *numStr;

@property (nonatomic,copy,readonly) RACCommand *addCommand;

- (instancetype)initWithModel:(DemoModel *)model;

@end
CellViewModel: 暴露出Cell渲染需要的所有数据
RACCommand *addCommand;: 按钮点击事件的指令,触发后需要在CellViewModel里面做处理。
//controller
- (void)iniData{
    self.viewModel = [[ViewModel alloc] init];
    // 发送请求
    RACSignal *signal = [self.viewModel.requestCommand execute:@{@"page":@"1"}];
    [signal subscribeNext:^(id x) {
        NSLog(@"x=======%@",x);
        if([x boolValue] == 1){//请求成功
            [self.mainTabelView reloadData];
        }
    }];
}
- (UITableViewCell*)tableView:(UITableView *)tableView cellForRowAtIndexPath:(NSIndexPath *)indexPath{

    MVVMTableVIewCell *cell = [tableView dequeueReusableCellWithIdentifier:@"Cell_identifer"];
    if(cell == nil){
        cell = [[MVVMTableVIewCell alloc] initWithStyle:UITableViewCellStyleDefault reuseIdentifier:@"Cell_identifer"];
    }
    //更新cell UI 数据
    cell.cellViewModel = [self.viewModel itemViewModelForIndex:indexPath.row];
    cell.selectionStyle = UITableViewCellSelectionStyleNone;

    return cell;
}iniData:初始化ViewModel,并发送请求命令。这里可以监听这个完成信号,进行刷新视图操作
cell.cellViewModel = [self.viewModel itemViewModelForIndex:indexPath.row]; 根据主视图的ViewModel去获取Cell的ViewModel,实现cell的数据绑定。
//TableViewCell

    RAC(self.titleLabel,text) = RACObserve(self, cellViewModel.titleStr);
    RAC(self.numLabel,text) = RACObserve(self, cellViewModel.numStr);

    [[self.addBtn rac_signalForControlEvents:UIControlEventTouchUpInside] subscribeNext:^(id x) {
        NSLog(@">>>>>");
        [self.cellViewModel.addCommand execute:nil];
    }];
在Cell里面进行与ViewModel的数据绑定,这边有个注意Racobserve左边只有self右边才有viewModel.titleStr这样就避Cell重用的问题。
[self.cellViewModel.addCommand execute:nil];:按钮的点击方法触发,事件的处理在CellViewModel中。
到此,相信大家对“iOS架构从MVC、MVP到MVVM源码分析”有了更深的了解,不妨来实际操作一番吧!这里是捷杰建站网站,更多相关内容可以进入相关频道进行查询,关注我们,继续学习!
本站采用系统自动发货方式,付款后即出现下载入口,如有疑问请咨询在线客服!
售后时间:早10点 - 晚11:30点
 服务热线 19970861797

 返回顶部
返回顶部